To make Jenkins accessible from outside of the local machine without having to open ports and accessing Jenkins directly. Also if you’re planning to use SSL (which you should!) it’s much easier to do that using IIS instead of the Java tools for that if you’re more experienced in the Microsoft world than the Java one.
In situations where you have existing web sites on your server, you may find it useful to run Jenkins (or the servlet container that Jenkins runs in) behind IIS, so that you can bind Jenkins to the part of a bigger website that you may have. This section discusses some of the approaches for doing this.
To achieve the same we will use reverse proxy. The reverse proxy mode allows to forward traffic from IIS to another web server (Jenkins in this example) and send the responses back through IIS. This allows us to assign a regular DNS address to Jenkins.
Update Jenkins URL prefix:
Before turning our attention to IIS though, we need to tell Jenkins about our prefix (subdirectory). To do this, open C:\Program Files (x86)\Jenkins\jenkins.xml and add --prefix=/jenkins to the <arguments>entry.
Restart the service with Restart-Service jenkins and confirm everything is working by visiting http://localhost:8080/jenkins in your browser; you should see the initial setup page.
Prerequisites:
You need an installation of latest version of IIS and you need to install the additional modules “URL Rewrite” and “Application Request Routing”. The easiest way to install these modules is through the Microsoft Web Platform Installer.
Steps to configure IIS as reverse proxy
Once “URL Rewite” and “Application Request Routing” modules are installed, open IIS Manager and navigate to the URL Rewrite settings for the website which Jenkins should live under (9/10 times, this is “Default Web Site”, if you have not chnaged it). The next step is to select the site, go to “URL Rewrite” and create a new rule by selecting “Add Rule” on the right action menu.
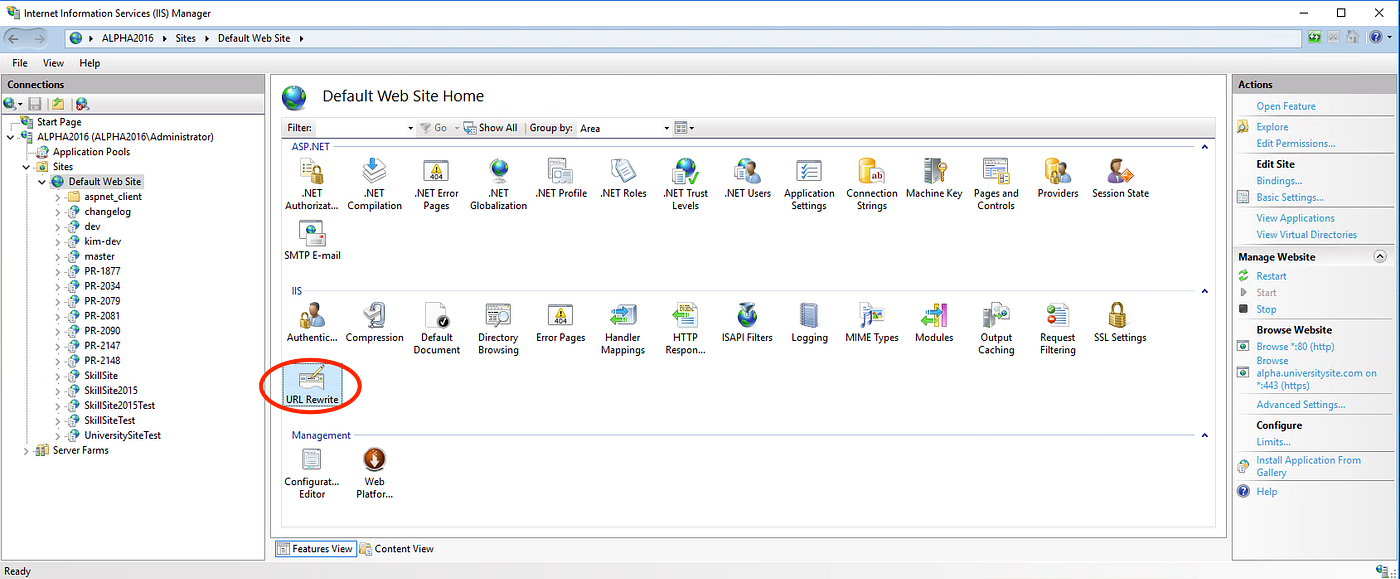
The first time you’re creating a new reverse proxy rule, IIS Manager will ask you to add reverse proxy rules, confirm it.
Add a rule for IIS to forward all requests to /jenkins/* to the Jenkins servlet. Click “Add Rule(s)” from the menu on the right, select “Reverse Proxy,” and in the window that pops up, enter localhost:8080 as the forwarding address, and click OK.
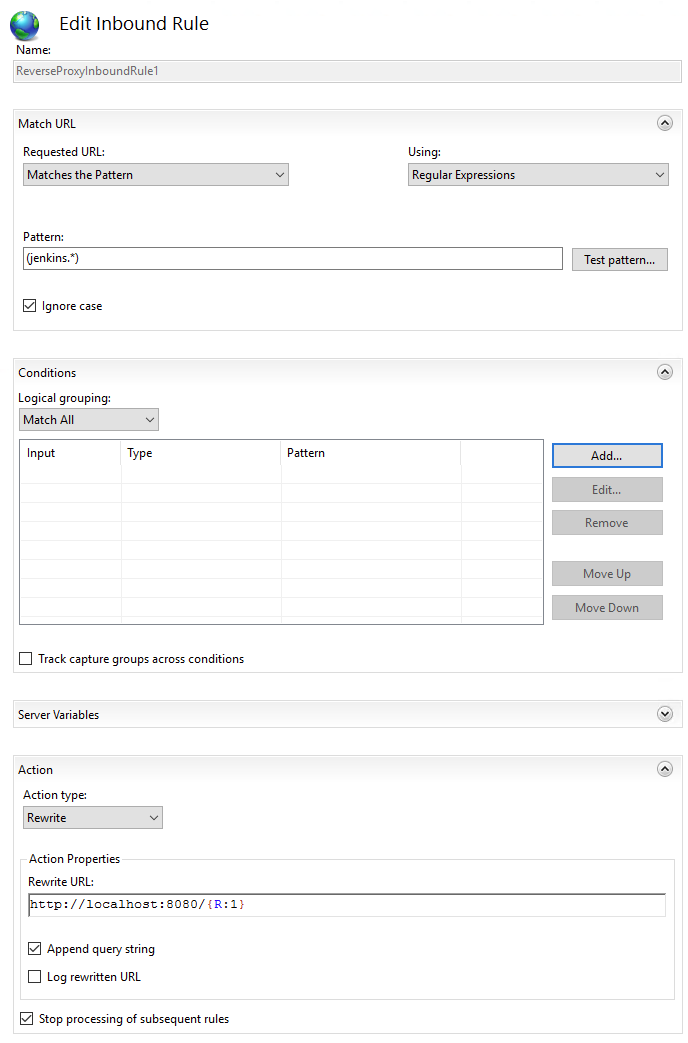
You aren’t done yet with this rule however; as it stands it will send every request to Jenkins. To restrict proxying to our /jenkins subdirectory, double click on the newly created rule and add your prefix to the pattern inside the matching group; you want to ensure that the prefix is included in the URL proxied to Jenkins. Your final inbound rule should look something like this:
After saving aboive information web.config file should look like:
<configuration>
    <system.webServer>
        <rewrite>
            <rules>
                <rule name="ReverseProxyInboundRule1" stopProcessing="true">
                    <match url="(jenkins.*)" />
                    <action type="Rewrite" url=http://localhost:8080/{R:1} />
                </rule>
            </rules>
        </rewrite>
    </system.webServer>
</configuration>
This rule forwards all the traffic to http://localhost:8080/, the address on which Jenkins is running.
I you are not forwarding to a localhost address, you need to go into the dialogs of Application Requet Routing and check the “Enable proxy” property.

At this point you should be able to access Jenkins via IIS. Visit mysite.com/jenkins to complete setup and configure your Jenkins instance. Note, you’ll want to set the “Jenkins URL” to your FQDN under Manage > Configure System.
You are done.