You can download Virtualize CE or Enterprise edition from the Virtualize product page. For CE all it takes is supplying an active email address where the download link will be sent to. It’s quite a big download at 1.1 GB, but this has a reason: it includes the full version of Virtualize, SOAtest (the Parasoft functional testing solution) and Load Test. This means that when you decide to upgrade to the full version, all you need is another license. No reinstalling of software required. After downloading and installing the software, you can simply unlock the CE license through the Preferences menu by entering the email address you supplied to get a download link. That’s it.
If want to go for enterprise edition and want to use Virtualize for bigger teams you will need to have Parasoft Environment Manager and License server as well.
Installation on Windows machine
To install:
- Run the setup executable that you downloaded from the Parasoft Web site.
- Follow the installation program’s onscreen instructions.
After you have completed the installation program, Virtualize will be installed on your machine. Virtualize will be installed in the specified installation directory.
The default workspace will be set to <user_home_dir>/parasoft/workspace (e.g., C:\Users\username\parasoft\virtualize_workspace)
This default workspace is preselected in the Select a Workspace dialog when you first start Virtualize. If you select a different workspace, that new workspace will be preselected when you start Virtualize from that point forward.
The command line interface uses the default workspace any time that you do explicitly specify a workspace from the command line (with the “-data” argument)—whether or not you have previously run the command line interface with another workspace.
Startup
To start Virtualize:
- Double-click the Virtualize desktop icon or choose Programs> Parasoft> Virtualize 9.x> Virtualize from the Windows Start menu.
Note: You must install a license before you begin using Virtualize.
1) Navigate to your Preferences or Click here to edit license preferences

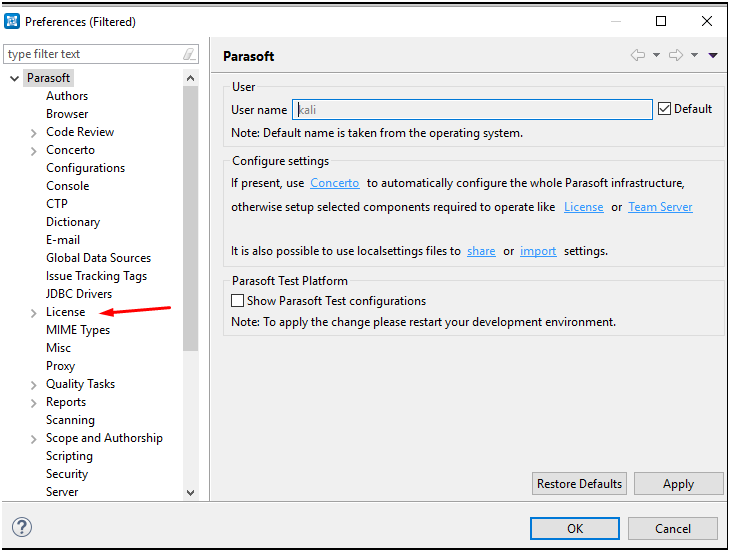
2a) If you Navigated to Parasoft-> Preferences you need to navigate to the license page
2b) If you Click on Activate License you should see the following window pop up
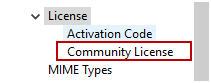
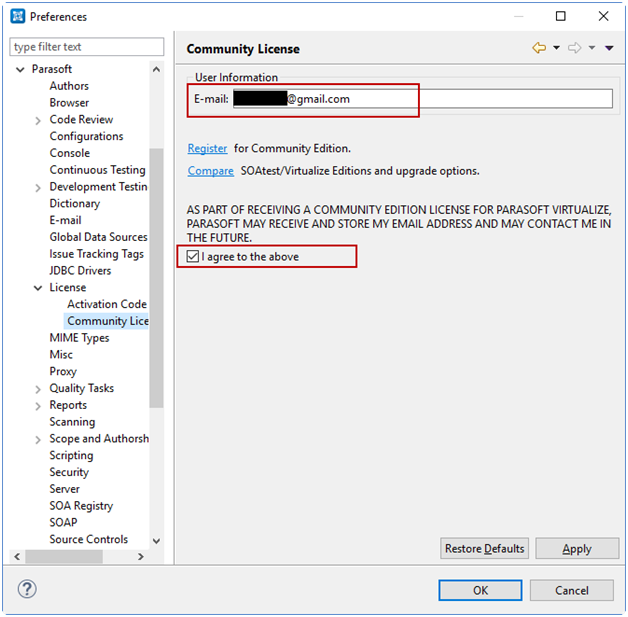
3) Once you are on the license page you will need to navigate to the Community License page which you can find under the license tab.
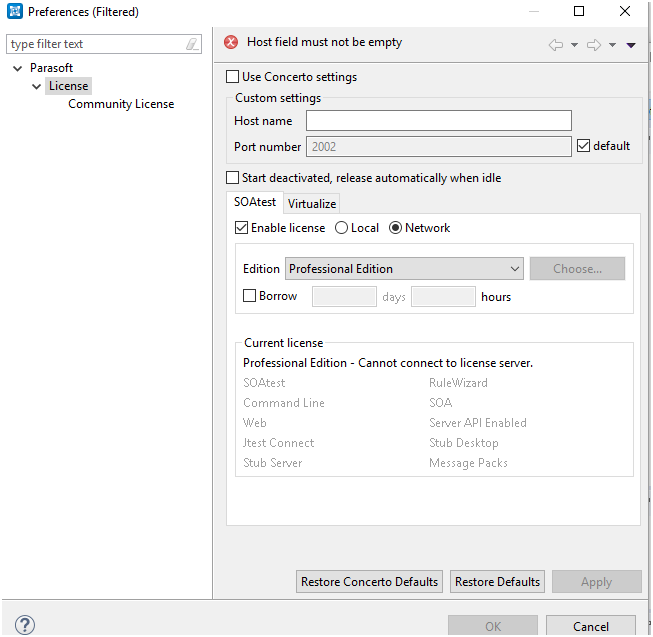
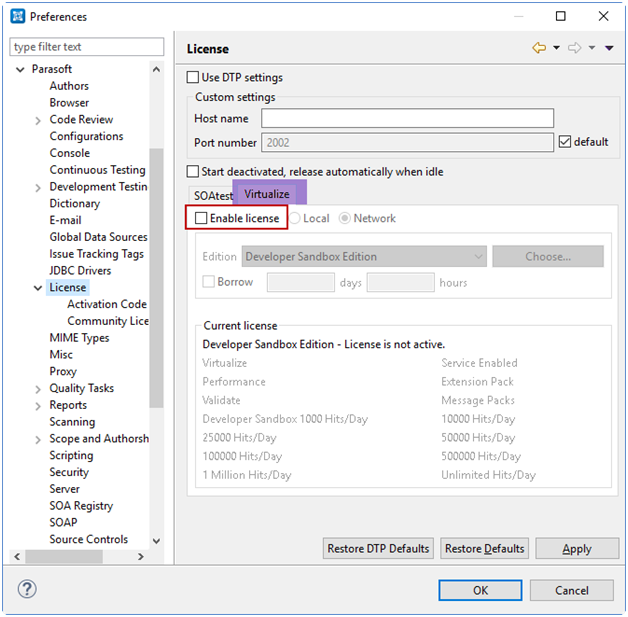
4) If you get the following error while trying to navigate to the Community License page.

Please uncheck the enable licenses for both Soatest and Virtualize and try navigating back to the Community License Page.
5) Once you have navigated to the Community License Page, you will be able to enter the email you have registered to activate your license.
Installation on Linux machine
To install:
- If you haven’t already done so, copy the installation file to the directory where you would like to install Virtualize.
- Change directories to the directory where you are going to install Virtualize.
- Set “execute” permissions on the installer.
chmod +x parasoft_virtualize_9.x_linux.sh
chmod +x parasoft_virtualize_9.x_macosx.sh
- Execute the installer, then follow the onscreen instructions to complete the installation.
./parasoft_virtualize_9.x_linux.sh
./parasoft_virtualize__9.x_macosx.sh
A directory under parasoft/virtualize/9.x (Linux) or virtualize/9.x/ParasoftVirtualize.app/Contents/ParasoftVirtualize (Mac) will be created. We refer to this location as <virtualize_install_dir> throughout this user guide. The Virtualize executable, command line interface, examples, manuals, etc. are available within this directory.
The default Virtualize workspace will be set to <user_home_dir>/parasoft/workspace. This default workspace is preselected in the Select a Workspace dialog when you first start Virtualize. If you select a different workspace, that new workspace will be preselected when you start Virtualize from that point forward. The command line interface uses the default workspace any time that you do explicitly specify a workspace from the command line (with the “-data” argument)—whether or not you have previously run the command line interface with another workspace.
Startup
Linux
To run Virtualize GUI:
Change directories to the virtualize/9.x directory, then enter the following command at the prompt:
./Virtualize
To run Virtualize Command Line:
Change directories to the virtualize/9.x directory, then enter the following command at the prompt:
./virtualizecli
Note: You must install a license before you begin using Virtualize.
Installing the Data Repository Server
Windows
To install and start the repository server on Windows:
1.Extract DataRepositoryServer.zip from the zip file available in the Virtualize installation directory (For ex: C:\Program Files\Parasoft\SOAtest & Virtualize\9.10\DataRepositoryServer.zip). You can extract it into a location of your choice; however, we do not recommend extracting it into the Virtualize installation directory.
2.Start the server by running server.bat.
You can stop the repository server by pressing CTRL+C on its console.
Linux/Mac
To install and start the repository server on Linux or Mac:
1.Extract DataRepositoryServer.zip from the zip file available in the Virtualize installation directory. You can extract it into a location of your choice; however, we do not recommend extracting it into the Virtualize installation directory.
2.Start the server by running server.sh start.
You can stop the repository server by running server.sh stop.
The startup script (server.sh or server.bat) determines settings such as the data repository server port, username and password, connection properties for Parasoft Test Data Manager (TDM), etc. If you want to modify the default settings, edit the startup script. Changes will take effect when the script is used to restart the server.